MSA 인증 서비스 Keycloak 소개
Keycloak 이란?
Redhat 에서 개발한 서비스를 대상으로 하는 인증 & 권한 부여 오픈소스이다. 기반은 JBoss 와 WildFly 로 구성되어 있다. SSO, 소셜 로그인, LDAP, RDBMS 등의 User Federation 도 지원한다. 그 외에도 adapter, SPI, REST API 등을 제공한다.
기존에 OAuth 를 Spring Security 로 사용하려 했지만 oauth provider 쪽에서 예제가 많이 없어서 애를 먹었다. 그러다가 많은 예제들에서 나온것이 Keycloak 하고 Okta. 둘다 비슷한 인증 & 권한 부여 솔루션이지만 keycloak 이 더 많은 기능을 제공한다는 점에서 Keycloak 을 사용해 보려고 한다.
keycloak 설치 & 실행
Keycloak 다운로드 에 접속해서 ZIP or TAR.GZ 파일을 다운로드 받는다.
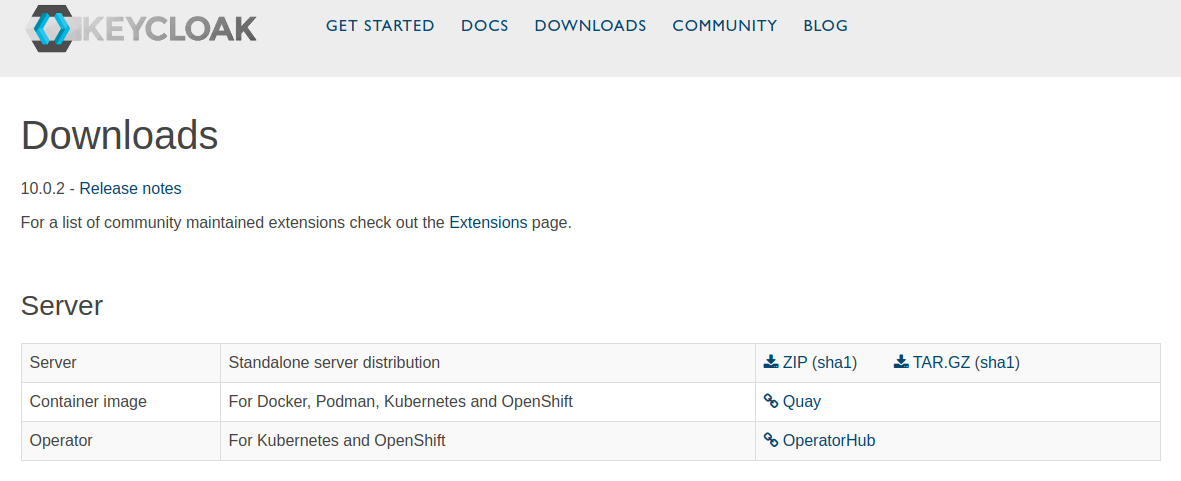
| ZIP | TAR.GZ 를 받았으면 압축을 해제한다. |
$ unzip keycloak-10.0.2.zip

$ tar -zxvf keycloak-10.0.2.tar.gz
압축 해제가 끝나면 “bin” 디렉토리로 이동해서 “standalone.sh” 또는 “standalone.bat” 을 실행한다.
# For Linux/Unix
$ cd bin
$ sh standalone.sh # or ./standalone.sh

# For Windows
$ \bin\standalone.bat
이러면 실행은 끝났다. 아주 쉽다. 이제 브라우저를 열고 http://localhost:8080/auth 으로 접속하자.
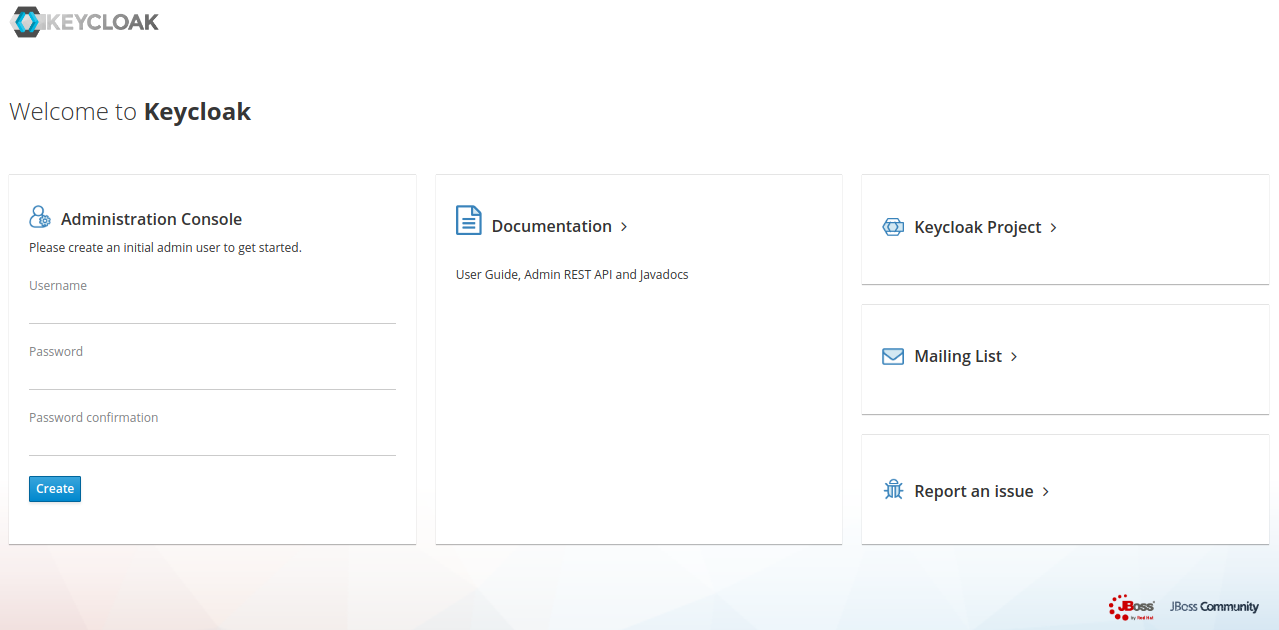
관리자 콘솔 화면이 나온다. localhost 로 실행했을 경우 보안적인 이유로 인해 계정이 없는 상태로 실행된다. 만약 계정이 추가된 상태로 실행하고 싶으면 bin/add-user.sh or bin/add-user.bat 을 실행하자.
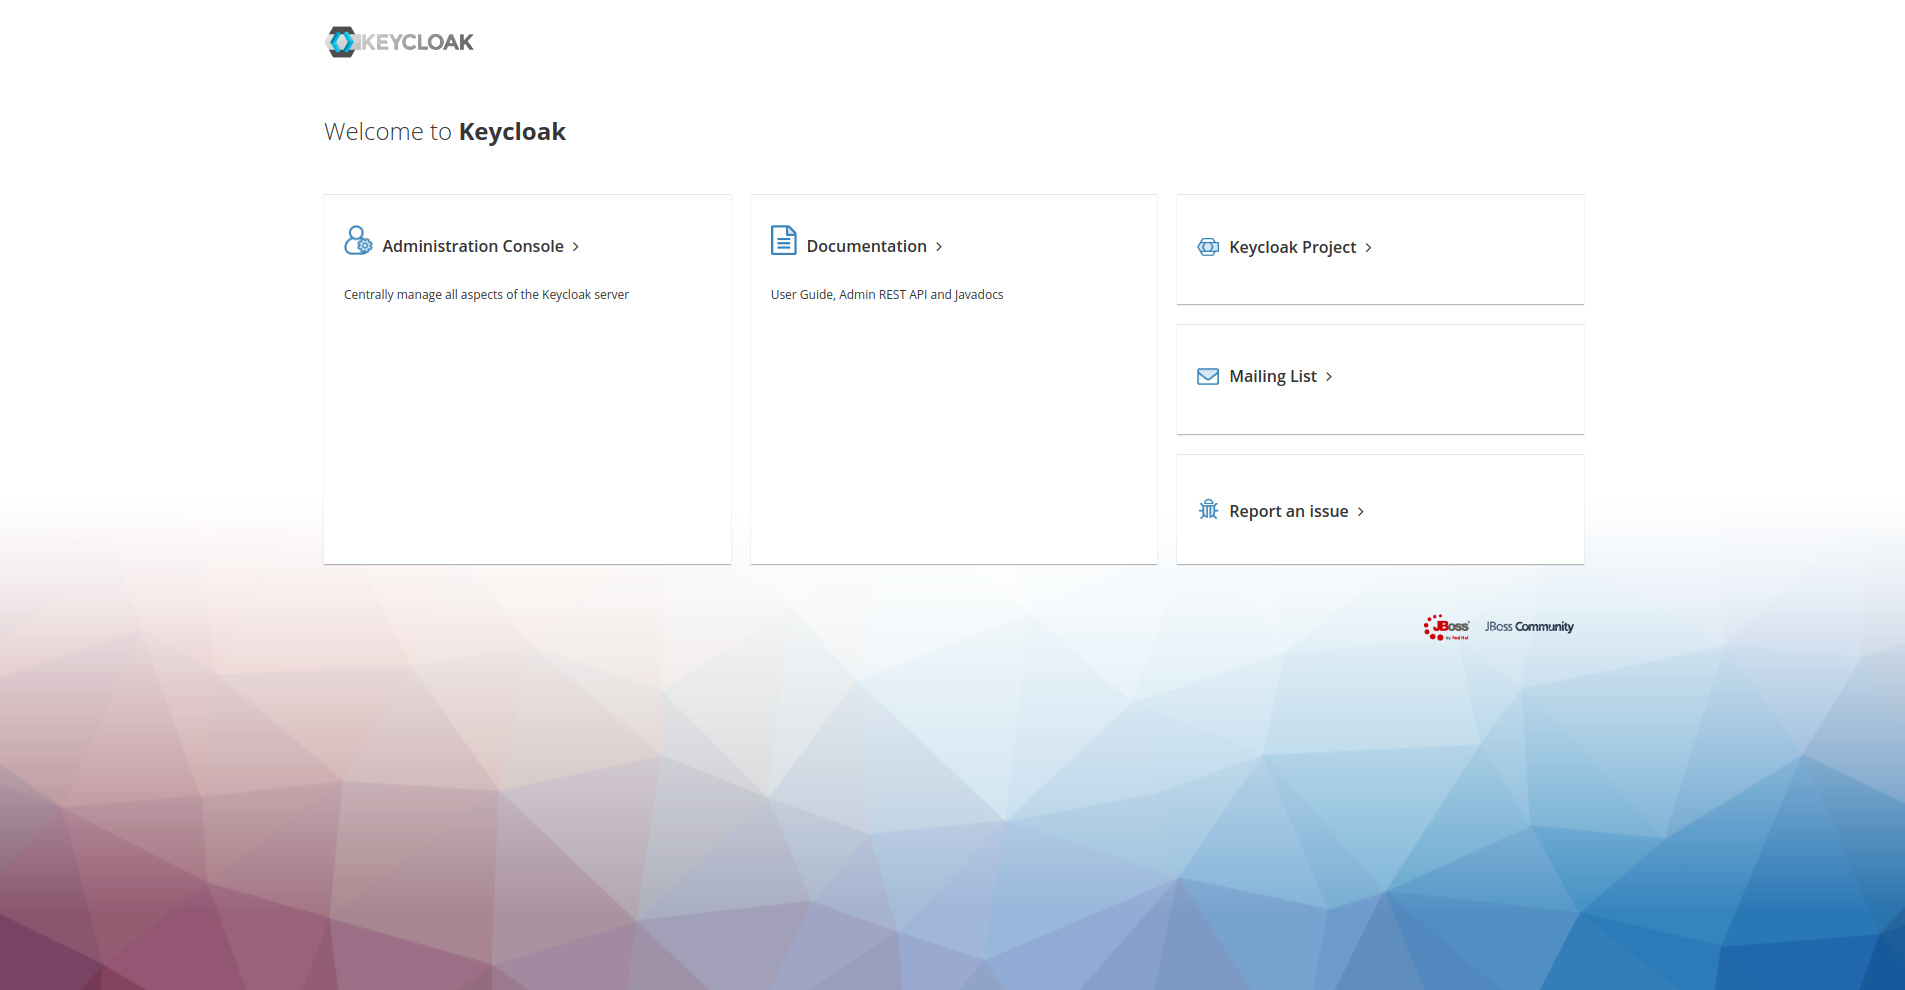
위 화면에서 “Administration Console >” 을 선택하면 로그인 화면이 나온다. 그러면 이전에 가입한 관리자 이름과 비밀번호를 입력하자.
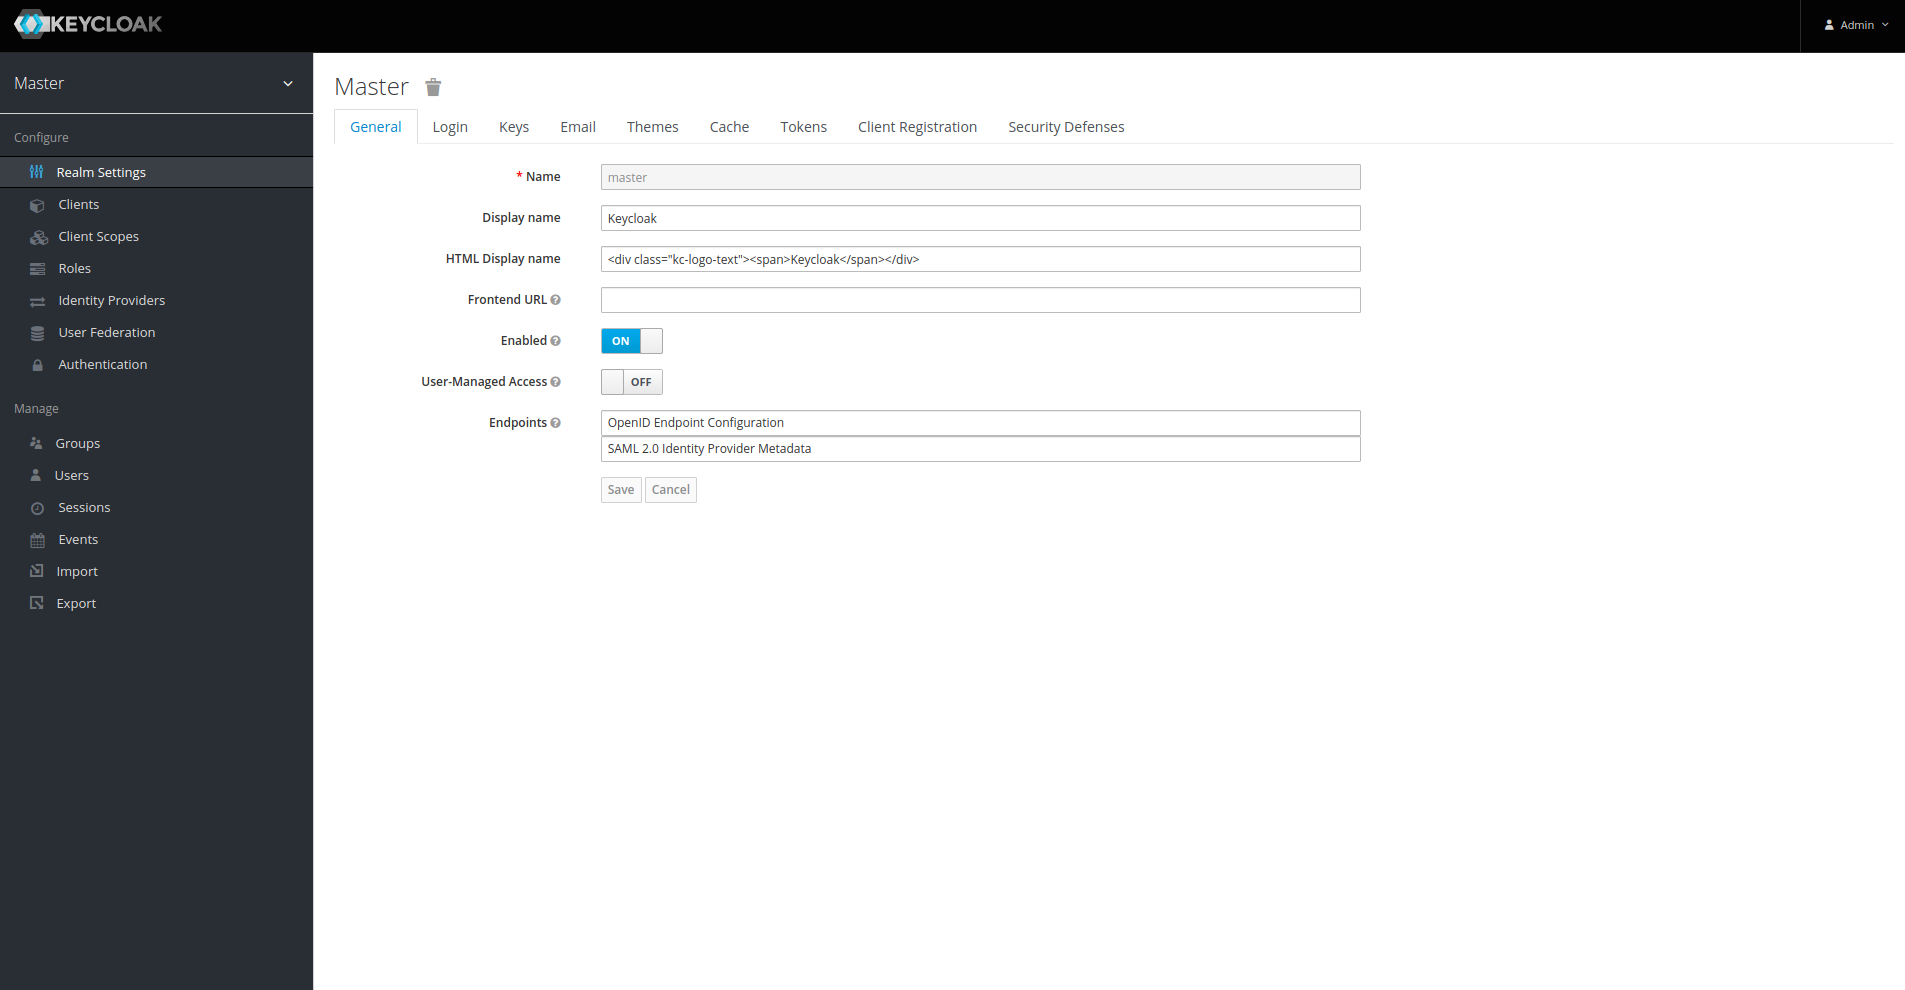
관리자 콘솔의 관리자 이름과 비밀번호를 입력하고 로그인을 하면 keycloak 관리자 화면이 나온다.
여기까지 오면 keycloak 실행까지는 끝난것이다.
Keycloak 관련 용어
- OIDC : OAuth 가 권한 부여만 다루는 것이라면 OIDC 는 OAuth 를 포함하여 인증과 권한부여를 모두 포함한 것이다. SSO 의 구현을 위한 수단으로 사용된다.
- Realm : 인증, 권한 부여가 적용되는 범위를 나타내는 단위이다. SSO 를 적용한다고 했을때 해당 SSO 가 적용되는 범위는 Realm 단위이다.
- Client : 인증, 권한 부여 행위를 대행하도록 맡길 어플리케이션을 나타내는 단위이다. 그 단위는 웹사이트 혹은 REST API 를 제공하는 서비스도 될 수 있다. 하나의 Realm 에 n개의 Client 를 생성, 관리할 수 있다.
- User : Client 에 인증을 요청할 사용자를 나타낸다. 하나의 Realm 에는 Realm 에 종속된 n개의 User 를 생성하고 관리할 수 있다. 기본적으로 User 는 Username, Email, FirstName, LastName 으로 구성되어 있지만 Custom User Attribute 를 사용하면 사용자가 원하는 속성을 추가할 수 있다.
- Role : User 에게 부여할 권한 내용을 나타낸다. 여기에는 Keycloak 의 REST API 를 사용할 권한을 부여할 수 있고 사용자가 정의한 권한을 부여할 수도 있다.
참고 : https://jsonobject.tistory.com/445
Keycloak 설정
MSA 에서 인증, 권한 부여 서비스로 keycloak 을 사용하기 위해서는 다음 설정들을 해줘야 한다.
- Realm 생성
- Client 생성
- User 생성
Realm 은 초기에는 Master Realm 만 존재한다. 하지만 우리는 Master 가 아닌 MSA 에서 사용할 렐름이 필요하기 때문에 생성해준다.
keycloak 관리자 화면에서 왼쪽 위에 Master 를 누르고 add realm 버튼을 누르자.
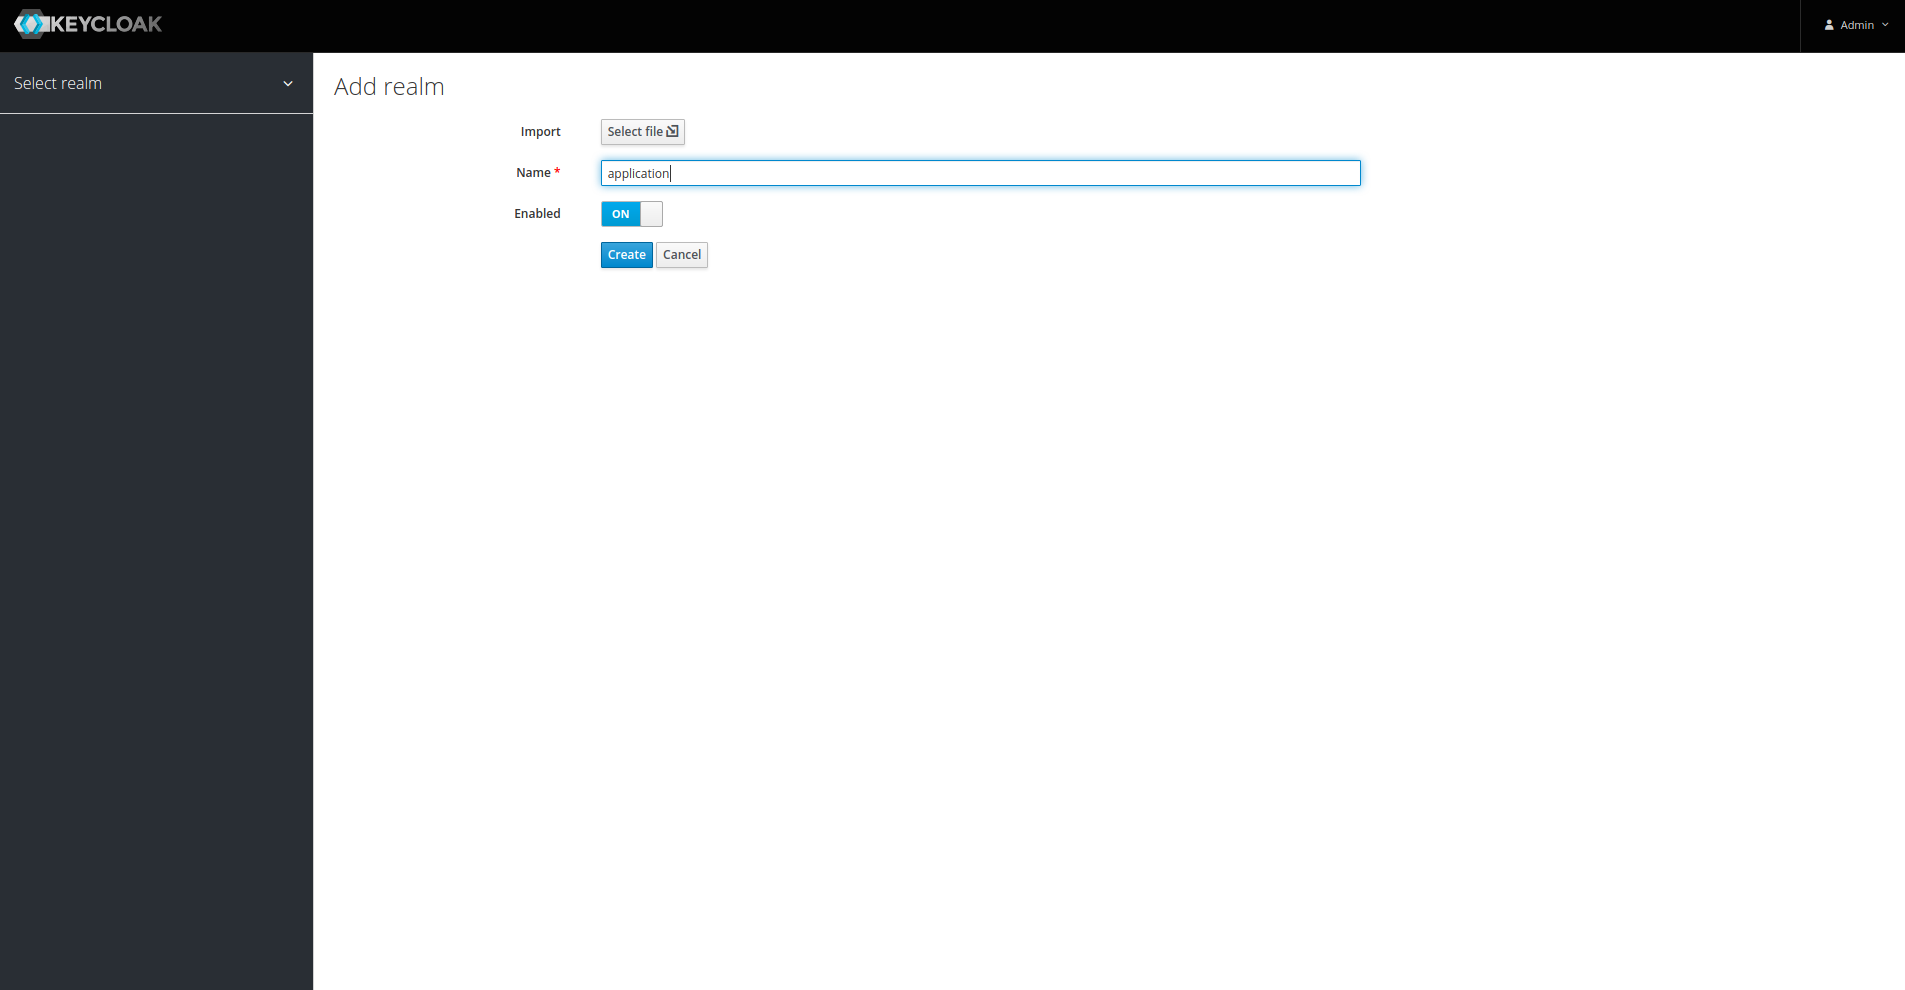
렐름을 생성하면 바로 새로 생성된 렐름의 관리 페이지로 이동한다.
Realm Settings 에서 설정할 수 있는건 일반설정, 로그인 화면 설정, 키 암호화 설정, 이메일 서비스 설정, 로그인/회원가입 등의 테마 설정, 캐시 설정, 토큰 설정등이 있다. 지금 당장은 바꿔야 할 부분은 없고 필요시 공식문서를 참고하자.
이제 client 를 생성하자.
마찬가지로 왼쪽에서 “Clients” 탭을 선택하자. 그러면 기본적인 클라이언트 목록이 나오는데 건드릴 필요는 없고 우측 위에 보이는 “Create” 버튼을 눌러 Client 를 생성하자.
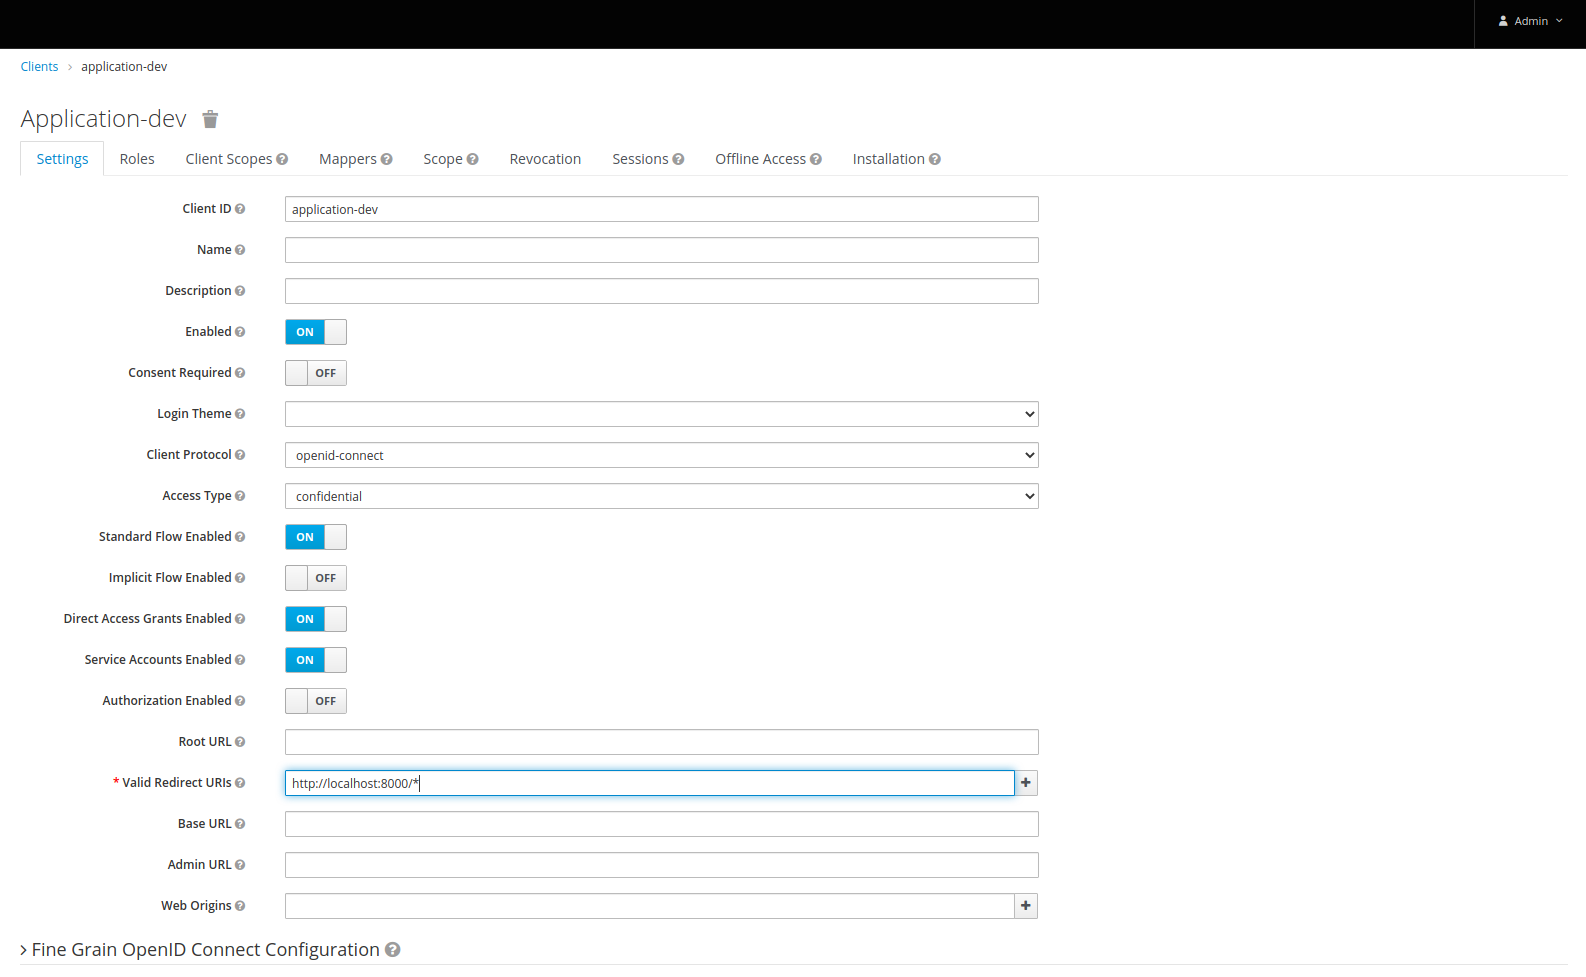
여기 역시 필요시 공식문서를 참고하여 설정하면된다. 지금 당장 필요한 옵션은 2가지가 있다. 첫번째는 Client-secret 을 생성하기 위한 Access Type 탭. 해당 값을 public 에서 confidential 으로 변경한다. 그리고 나중에 User 관련 REST API 를 사용하기 위해 필요한 Service Accounts Enabled 탭을 활성화 시켜준다.
마지막으로 “*” 처리가 되어있는 Valid Redirect URIs 부분이 있는데 인증 후 리다이렉트 될 주소를 입력해주면된다. 나의 경우는 gateway 주소로 입력했다.
전부 완료됬으면 save 버튼을 눌러 저장하자.
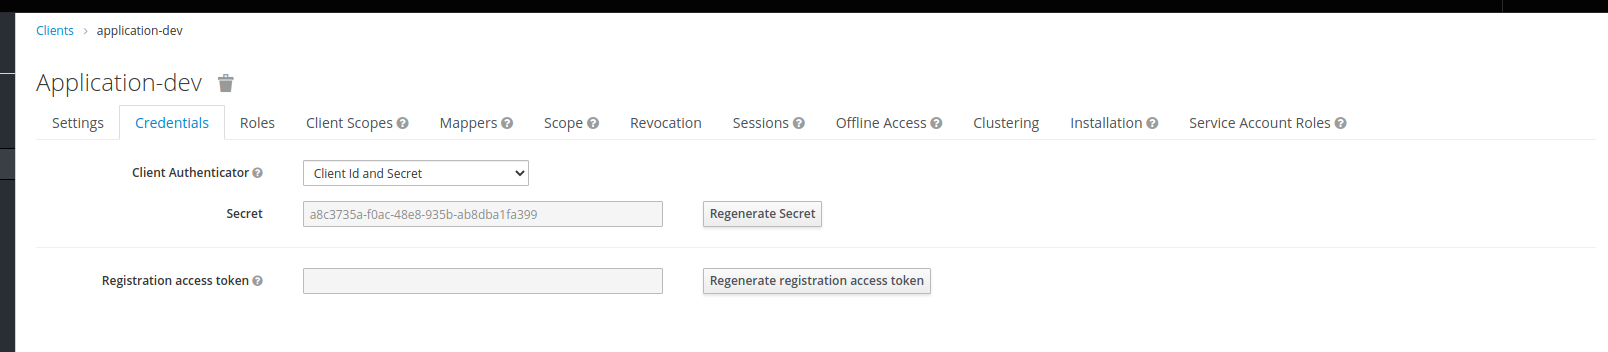
client 설정이 끝났다. 이제 client-secret 이 잘 생성되었는지 Clients -> Credentials 탭에서 확인해보자.
마지막으로 인증할때 필요한 계정을 하나 추가해주자.

“Users” 탭을 클릭하면 유저 목록이 나오는데 당연히 하나도 없다. 그래서 오른쪽에 “Add user” 를 클릭해서 유저를 추가하자.
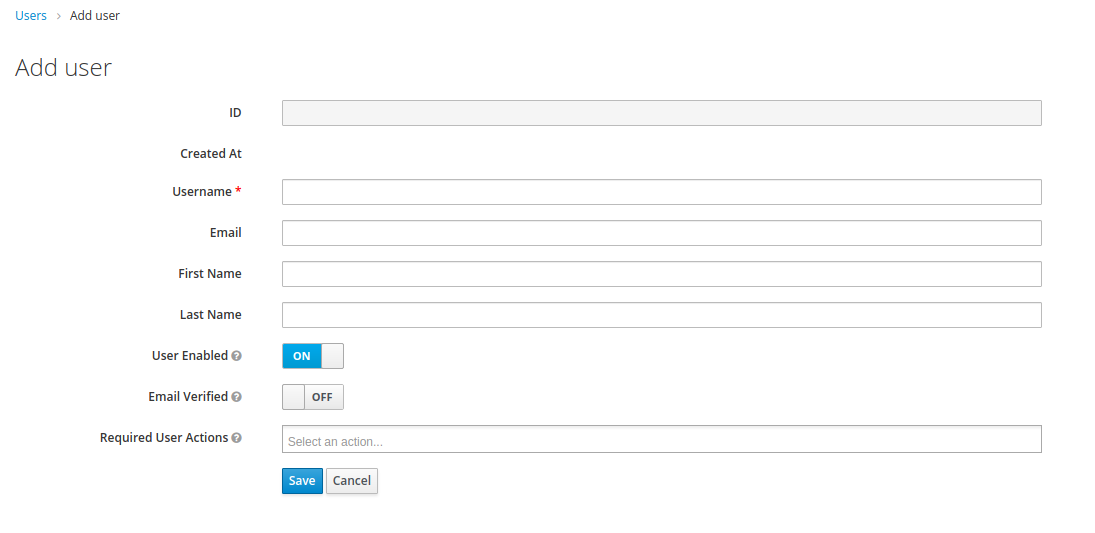
위에서 말했듯이 기본적으로 Username, Email, First Name, Last Name 이 있다. 그런데 비밀번호 입력칸은..? 뭐 일단 Username 만 별표가 있으니 그것만 입력하고 저장하자.
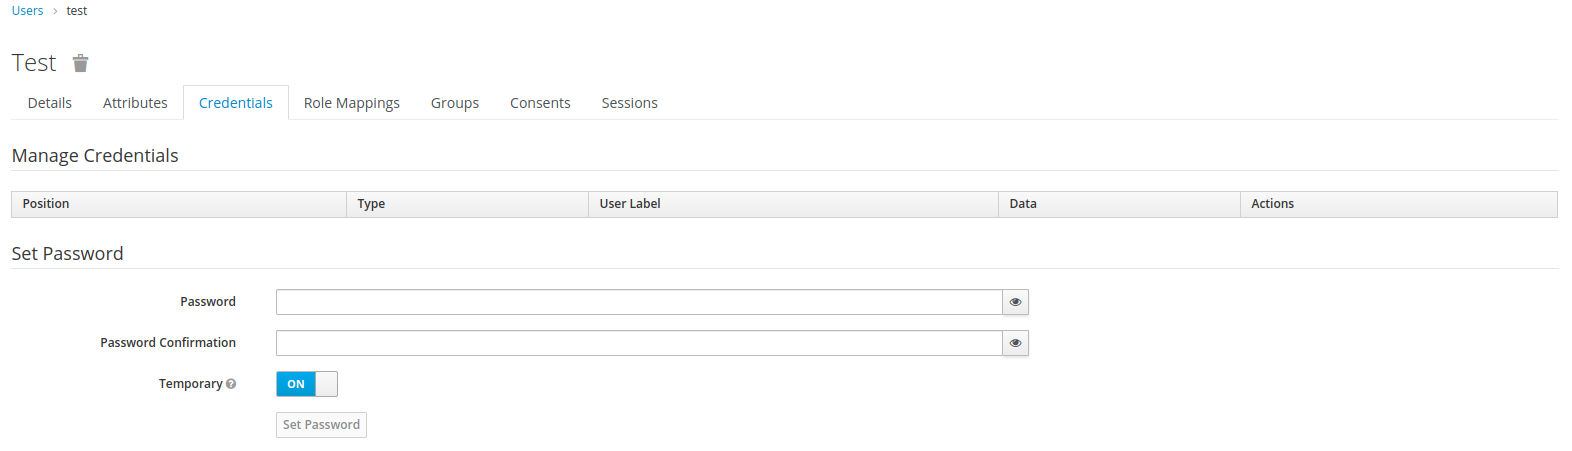
저장이 완료되면 페이지가 새로고침되며 “Credentials” 탭이 생긴것을 볼 수 있다. 탭을 클릭하면 비밀번호를 입력하는 곳이 나온다. 여기서 유저의 비밀번호를 추가해주자.
이제 Gateway 를 위한 keycloak 설정을 끝이 났다.
Gateway 설정
위에서 설정한 keycloak 을 이용하기 위해 Gateway 에서도 설정을 해주자.
config 서버에 있는 gateway 설정파일에 다음과 같이 코드를 입력하자.
spring:
  security:
    oauth2:
      client:
        provider:
          keycloak:
            issuer-uri: http://{keycloak address}/auth/realms/{realm name}
            user-name-attribute: preferred_username
        registration:
          keycloak:
            client-id: {client name}
            client-secret: {client secret}
    gateway:
      default-filters:
        - TokenRelay=
그리고 Gateway 프로젝트에서 src/main/java/com/{groupId}/{artifactId}/config 밑에 클래스파일을 하나 추가하자.
@Order(99)
@Configuration
@EnableWebFluxSecurity
public class GatewayWebSecurityConfiguration {

  @Bean
  public SecurityWebFilterChain springSecurityFilterChain(ServerHttpSecurity http, ReactiveClientRegistrationRepository clientRegistrationRepository) {
    // Authenticate through configured keycloak SSO Provider
    http.oauth2Login();
    // Also logout at the keycloak SSO Connect Provider
    http.logout(logout -> logout.logoutSuccessHandler(
      new OidcClientInitiatedServerLogoutSuccessHandler(clientRegistrationRepository)
    ));
    // Require authentication for all requests
    http.authorizeExchange().anyExchange().authenticated();
    // Allow showing /home within a frame
    http.headers().frameOptions().mode(Mode.SAMEORIGIN);
    // Disable CSRF in the gateway to prevent conflicts with proxied server CSRF
    http.csrf().disable();

    return http.build();
  }

}
지금 개발중인 MSA 프로젝트에서 Gateway 는 Spring Cloud Gateway 를 사용하였다. 기본적으로 비동기적으로 처리되기 때문에 WebFlux 를 사용하였다.
모두 작성 후 오류가 날 경우에는 다음 두개의 Dependency 를 추가하자.
- spring-boot-starter-oauth2-client
- spring-cloud-starter-security
코드 작성이 완료되었으면 config, discovery, gateway 서비스를 실행해보자. gateway 로 접속하면 이전에 보았던 keycloak 로그인 화면이 보일 것이다.
일단 Gateway 까지는 keycloak 이 잘 적용된 것이다.
Service 설정
이제 마지막으로 REST API 서비스등에 적용할 설정을 보자.
config 서버에서 service 의 설정파일에 다음과 같이 작성하자.
spring:
  security:
    oauth2:
      resourceserver:
        jwt:
          issuer-uri: http://{keycloak address}/auth/realms/{realm name}
Dependency 는 다음과 같다.
- spring-security-oauth2-jose
- spring-security-oauth2-resource-server
- spring-cloud-starter-oauth2
- spring-cloud-starter-security
이제 시큐리티 설정 클래스 파일을 작성하자
@Configuration
@EnableWebSecurity
public class SecurityConfiguration extends WebSecurityConfigurerAdapter {

  @Override
  protected void configure(HttpSecurity http) throws Exception {
    // Validate tokens through configured OpenID Provider
    http.oauth2ResourceServer().jwt().jwtAuthenticationConverter(jwtAuthenticationConverter());
    // Require authentication for all requests
    http.authorizeRequests().anyRequest().authenticated();
    // Allow showing pages within a frame
    http.headers().frameOptions().sameOrigin();
  }

  private JwtAuthenticationConverter jwtAuthenticationConverter() {
    JwtAuthenticationConverter converter = new JwtAuthenticationConverter();
    // Convert realm_access.roles claims to granted authorities, for use in access decisions
    converter.setJwtGrantedAuthoritiesConverter(new KeycloakRealmRoleConverter());
    return converter;
  }

  class KeycloakRealmRoleConverter implements Converter<Jwt, Collection<GrantedAuthority>> {
    @Override
    public Collection<GrantedAuthority> convert(Jwt jwt) {
      final Map<String, Object> realmAccess = (Map<String, Object>) jwt.getClaims().get("realm_access");
      return ((List<String>) realmAccess.get("roles")).stream()
        .map(roleName -> "ROLE_" + roleName)
        .map(SimpleGrantedAuthority::new)
        .collect(Collectors.toList());
    }
  }
}
그리고 테스트를 위해 컨트롤러에 코드를 하나 작성하자.
@RestController
@RequestMapping(value = "/")
public class UserController {

	private final UserService userService;

	public UserController(UserService userService)	{
		this.userService = userService;
	}

	@PreAuthorize(value = "#oauth2.hasScope('email')")
	@GetMapping(value = "users/{userId}")
	public UserInfoDTO getUserInfo(@PathVariable String userId) throws Exception {

		UserInfoDTO userInfoDTO = new UserInfoDTO();
		userInfoDTO.setId(userId);

		return userService.getUserInfo(userInfoDTO);
	}

}
위 내용은 OAuth, JWT 로 인증을 처리한다는 것이며 권한은 email 일때만 Users API 를 조회할 수 있다.
이제 service 까지 실행해서 컨트롤러로 요청을 해보자. 로그인이 안되었다면 로그인 후 값이 출력될 것이다. 로그인 유저와 비밀번호는 이전에 keycloak 관리 페이지에서 만든 Username 과 Password 이다.
마치며
현재 keycloak 은 h2 데이터베이스를 사용해서 파일로 사용자를 관리하고 있다. 하지만 나는 내가 만들어놓은 사용자 테이블을 사용해서 인증을 하고 싶다. 다음에는 사용자 외부 테이블을 keycloak 에 연결하는 것을 알아보자.
댓글남기기